Workspace
Billing & plan limits
How Gromore billing works — your plan, the usage meters in Settings → Billing, how video credits are counted, and how to manage invoices, payment method, and plan changes.
Where billing lives
Gromore billing runs on Polar, our payment provider. Your plan is one of four tiers — trial, starter, growth, or agency. The trial is a free 7-day run of the app so you can set up tracking and see real data before you pay.
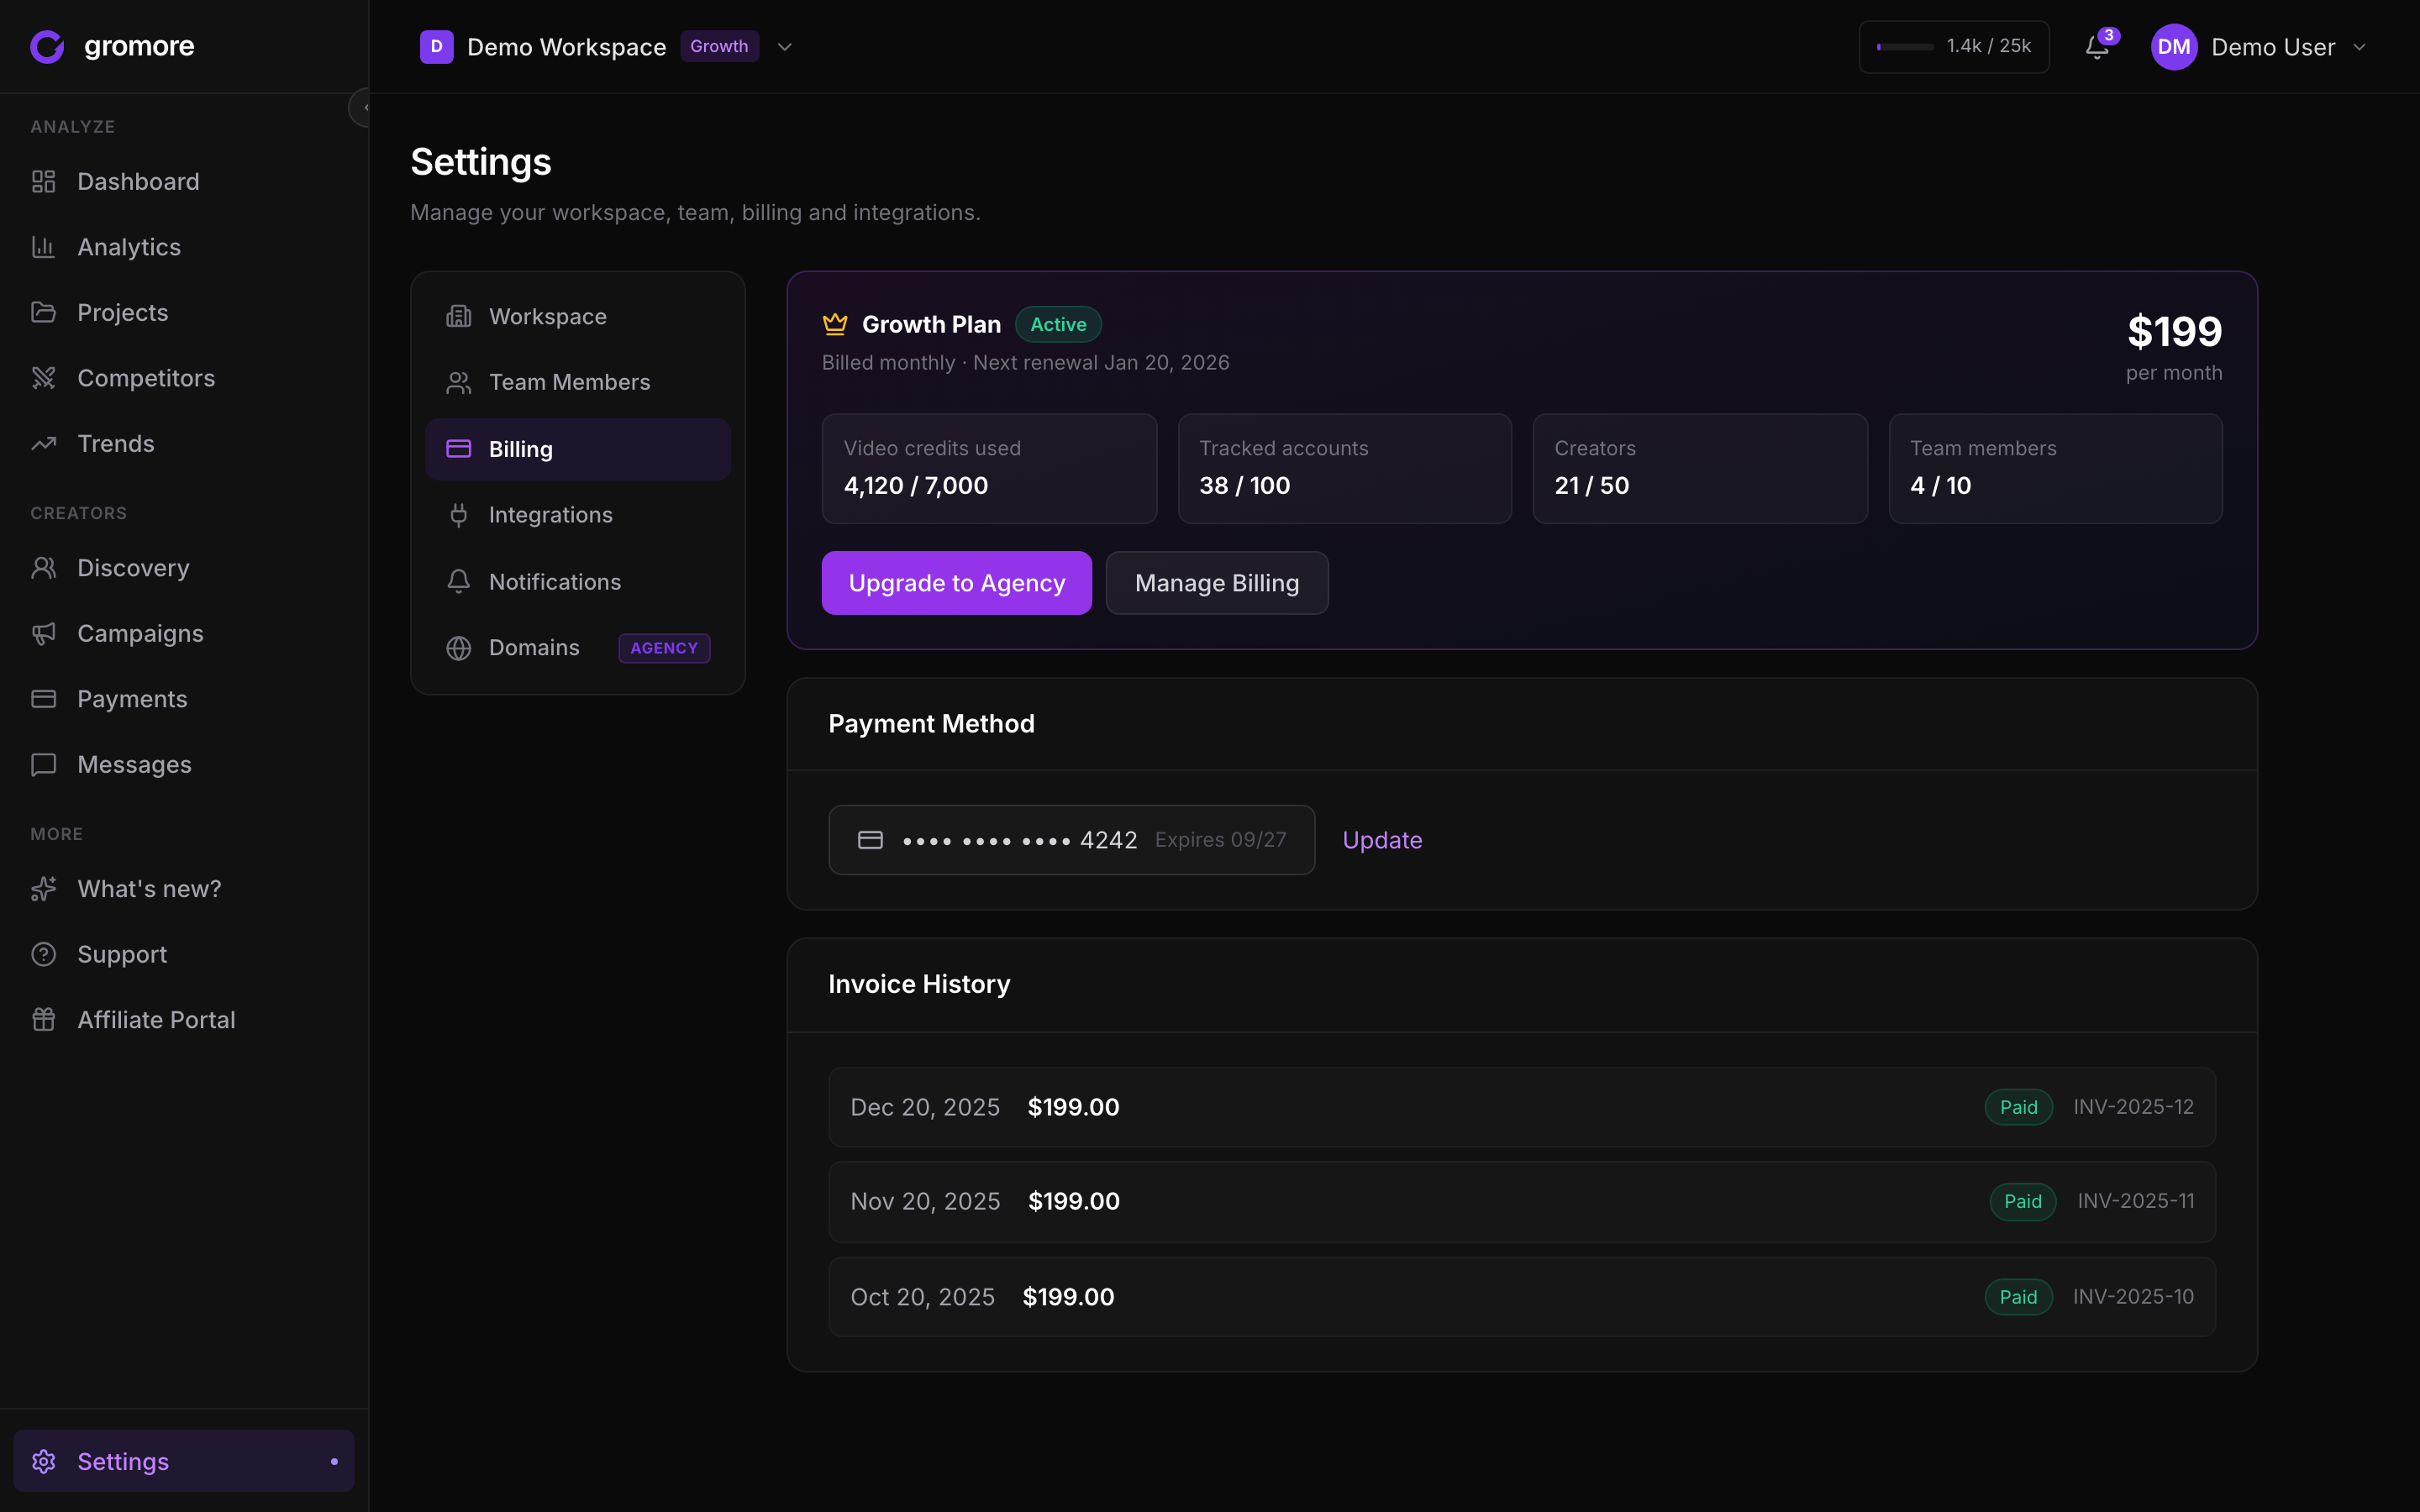
Everything about your subscription lives in one place: Settings → Billing. From there you can see the plan you're on, watch your usage against your limits, update your payment method, and open past invoices. When you want to check what you're allowed on your current plan, this page is the source of truth — it always shows your live numbers.
Your usage meters
Each plan comes with a set of allowances, and Settings → Billing shows them as live meters so you never have to guess. The main ones are video credits, tracked accounts, creators, and team seats.
We deliberately don't list fixed numbers in this guide because they change by plan and can be adjusted for your workspace. Open Settings → Billing to see exactly how much of each allowance you've used and how much is left. A few features are gated to higher tiers — for example creators, campaigns, and payouts need Growth or Agency, and custom domains need Agency — and the billing page makes clear what your plan includes.
How video credits work
A video credit is spent when Gromore captures a genuinely new video for you — a net-new post it hadn't already stored. This is different from most tools, which charge you for a tracking limit you pick up front. In Gromore you only spend on videos you actually collect.
Credits are pooled across every workspace you own, so one shared balance covers all of them. Deleting videos or accounts never refunds credits — once a video is captured, that credit is used.
When you reach your quota, Gromore hard-stops: there is no overage billing and no surprise charges. Features that consume credits simply pause until your next billing cycle resets your balance, or until you upgrade to a plan with more credits.
Invoices and payment method
Every charge produces an invoice you can review and download for your records, and your saved card is managed through Polar's secure portal — Gromore never stores your card details directly.
For your security, always start these actions from inside Gromore rather than from a link in an email.
- 1Go to Settings → Billing.
- 2To view or download a past invoice, find it in the invoice history and open it.
- 3To change your card, choose the option to update your payment method — this opens your secure Polar customer portal.
- 4Enter your new card details in the Polar portal and save; the change applies to your next charge.
Upgrading or downgrading
You can move between plans whenever your needs change. Upgrading raises your allowances (more credits, more accounts, and access to higher-tier features); downgrading lowers them at the end of your current cycle.
If a downgrade would put you above the new plan's limits, Gromore keeps your data safe rather than deleting anything — some of your most recently added accounts may be paused until you're back within range. Your usage meters in Settings → Billing will reflect the new plan once the change takes effect.
- 1Open Settings → Billing.
- 2Choose the plan you want to switch to.
- 3Confirm the change through the Polar checkout; upgrades take effect right away, and any charge is handled by Polar.
- 4Check your updated meters in Settings → Billing to confirm the new plan is active.